Page
Being Creative with Poser 8
by Charles McChesney
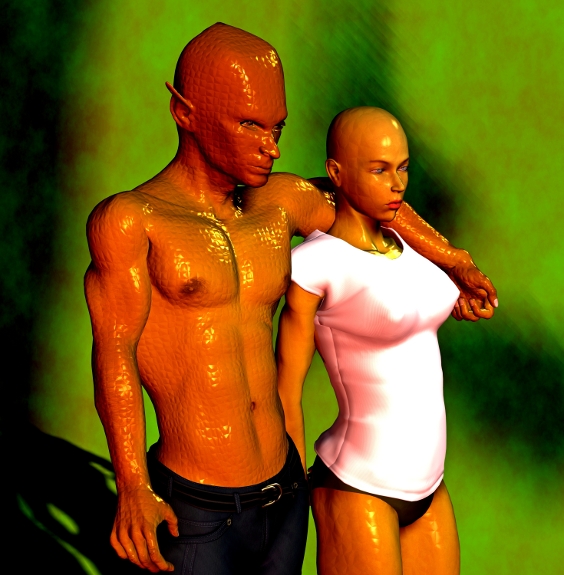
Illustration 1: Land of the Lizard People by Charles McChesney
This document explains how the work of art in Illustration 1 was created. First the character, lizard man was created. The primary software tool that was employed was Poser 8. The Ryan character, Diego, was used as a base. The head of the lizard man was not just a morph, but a different mesh with a different number of vertices than the head on the original Diego. If you have a new mesh to replace an existing body part on a figure like the one used here, then you must replace the body part with a the mesh as a prop. In Illustration 2 , there was a mesh worked in Amorphium 3 that needed to be exported out of Amorphium and into Poser in some format that Poser 8 could understand. Ordinarily this would be a Wavefront .obj file.
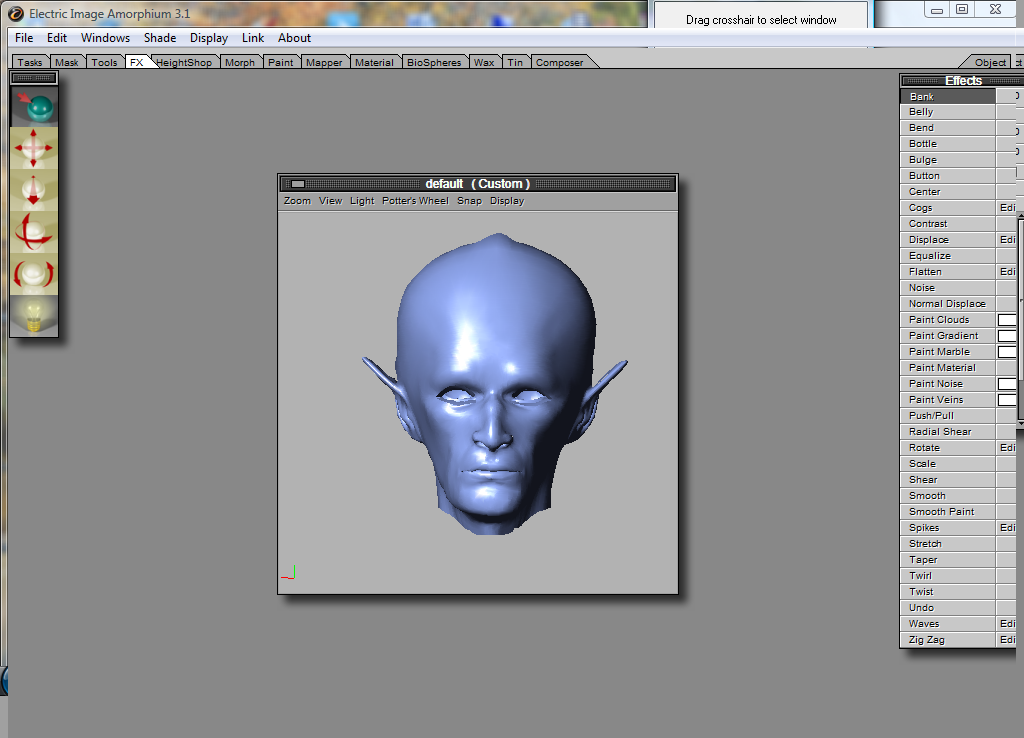
Illustration 2: Poser mesh being modeled in Amorphium 3.
After the mesh was imported into Poser, it became a prop. For this prop to replace the head body part, the prop was sized and posed the way that was needed for this replacement to take place. Both normal editing tools and the property panel parameters were used to make changes. At this juncture, the rest of the figure was posed as well. Poser 8 is great for posing figures. The pose library is almost made redundant by the ease that figures can now be posed with the properties panel.
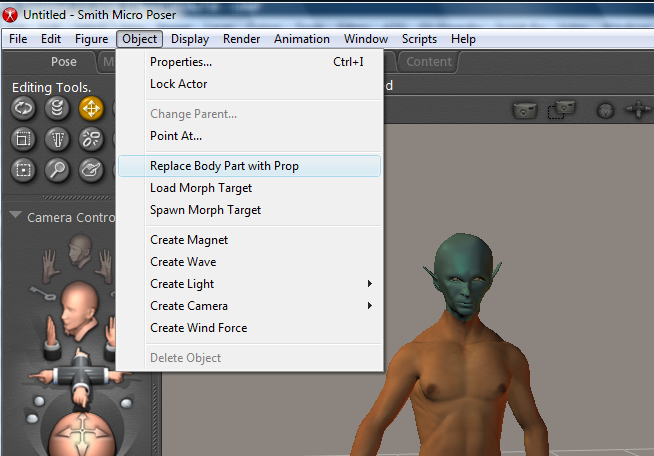
Illustration 3: Select the head body part. Pull down the Object Menu. Click on Replace Body Part with Prop.
In Illsustration3 the head was selected. Then the Object Menu was pulled down. When 'Replace Body Part with Prop' was pressed, a pop-up came on that will list all the props. The one with the name of our head prop was chosen. A warning came on at this point about bending which can be a bit perilous at this point. You can turn bending off. If posing was already done, there will be no problem.
Before starting to texture the project, the lizard man's better half was created. There has always been in art a beauty and the beast theme underlying many works. For this reason the lizard man's features were made more bizarre and unusual than were the features his female counterpart. The Poser figure used as a base figure was Alyson. All the morphing done on Alyson, both her face and body, were all done within Poser itself. The Face Room is a great place to create original faces and personalize your characters.
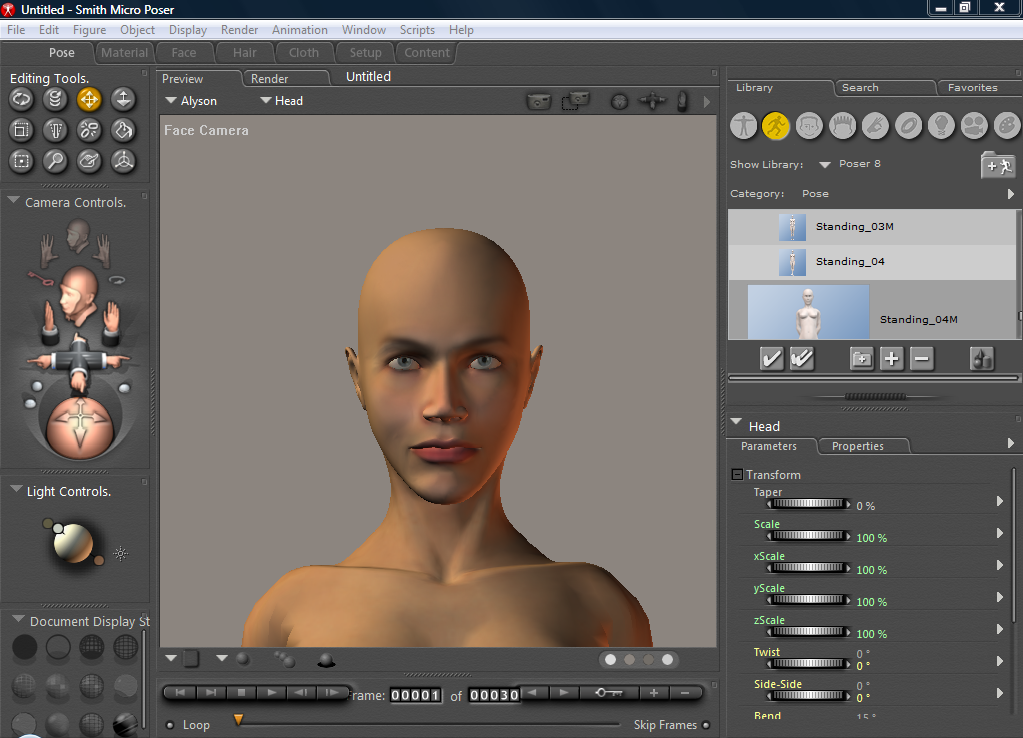
Illustration 4:Alyson downloaded from the figure library.
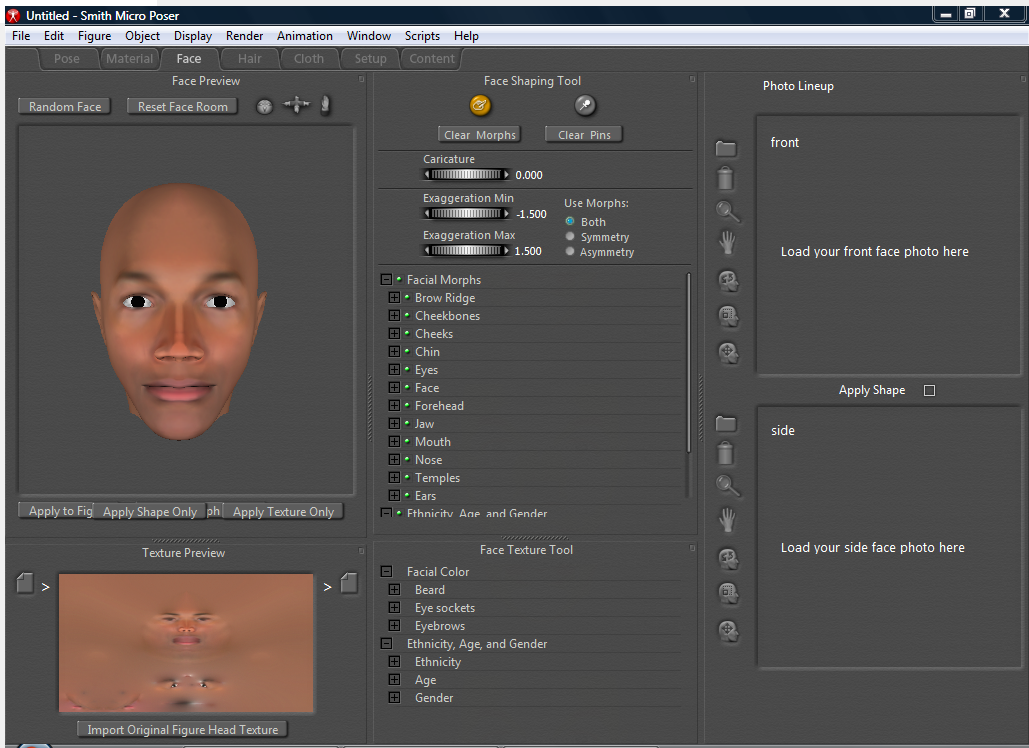
Illustration 6:One of a myriad of random faces that was chosen to create a face.
Here is a brief run down of how one can use the Face Room to create a quick, original, no hassles face. In Illustration 4, Alyson has been downloaded. Then a switch was made to the Face Room. In the Face Room a random series of heads was surveyed. An appealing face was discovered. Illustration 5 shows that face. Next it was given a texture. In this case Alyson's original texture was chosen by clicking for this at the bottom of the screen on the right. If desired the artist can create his own texture with the Face Texture Tool. After the texture was chosen, it was necessary to click on 'Texture Only' at the bottom right of the face to transfer that texture to our character.
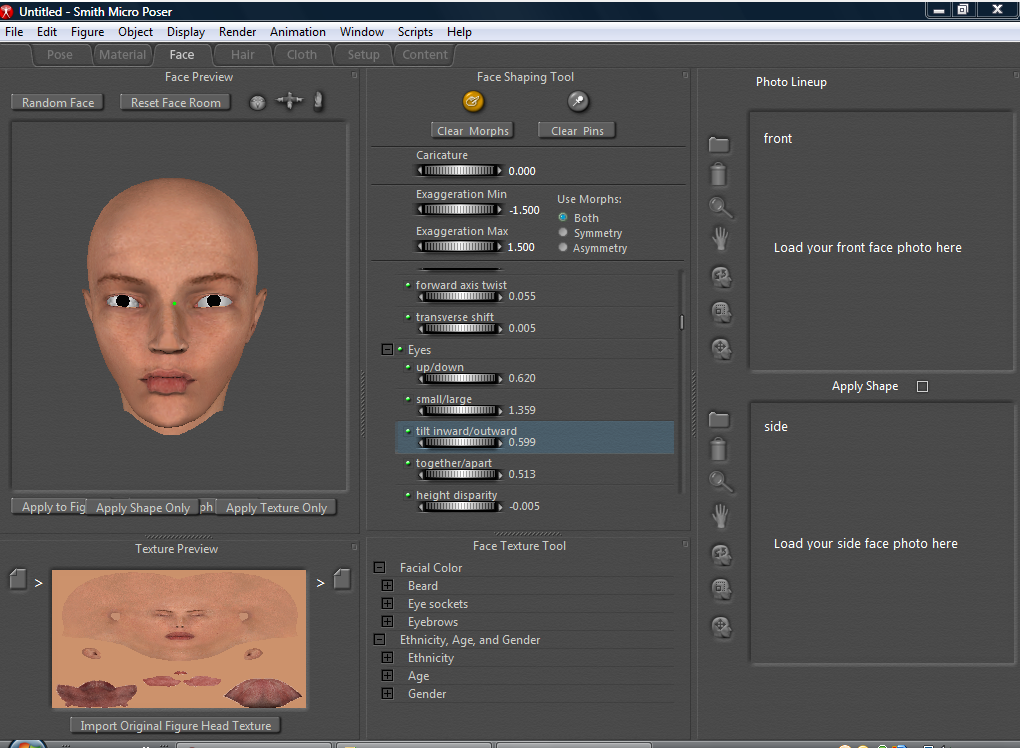
Illustration 7:Face Room morphing completed.
The next step required the Face Shaping Tool. Here just by pushing features around. A cursory elimination of unwanted characteristics and creation of desired traits were made. Then the more arduous task of going through each of the possible facial morphs was performed until a desirable face was created. As can be seen in Illustration 7 under the picture of the face, just barely visible, is a button that should say Spawn Morph Target. After pressing this the morph target was saved to the Pose Room.
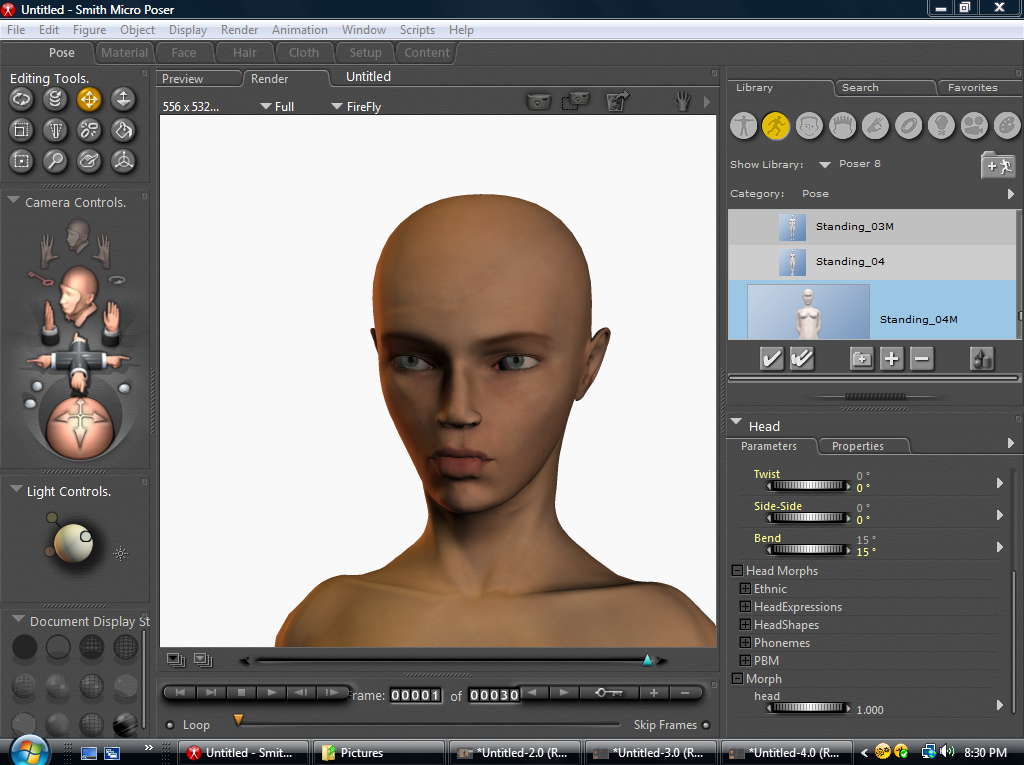
Illustration 8: Render of completed morph.
To morph Alyson's head it was necessary to set the the newly created gauge in the Morph section at the bottom of the parameters/ properties panel for head to 1.000. This gave the morph its full expression. It could have been set higher or lower to give it less or more of an effect. This is not actually the morph of Alyson that was used for the lizard girl. Normally when creating a character one would also check each of the morphs in the head parameter dials looking for improvements or to discover ideas on how to create an image that was more desirable. This was done with the lizard girl. Then the same was done with the lizard peoples' body morphs until the desired bodies were created as well.
The clothes were part of the basic, conforming clothing props that come with Poser 8. The idea behind having these strange aliens dressed so much like us was to portray the idea that they live in a culture and society just like our own and don't even realize that there is something strange about being lizard people. As we are estranged from reptilian humanity, they are also estranged from mammalian people.
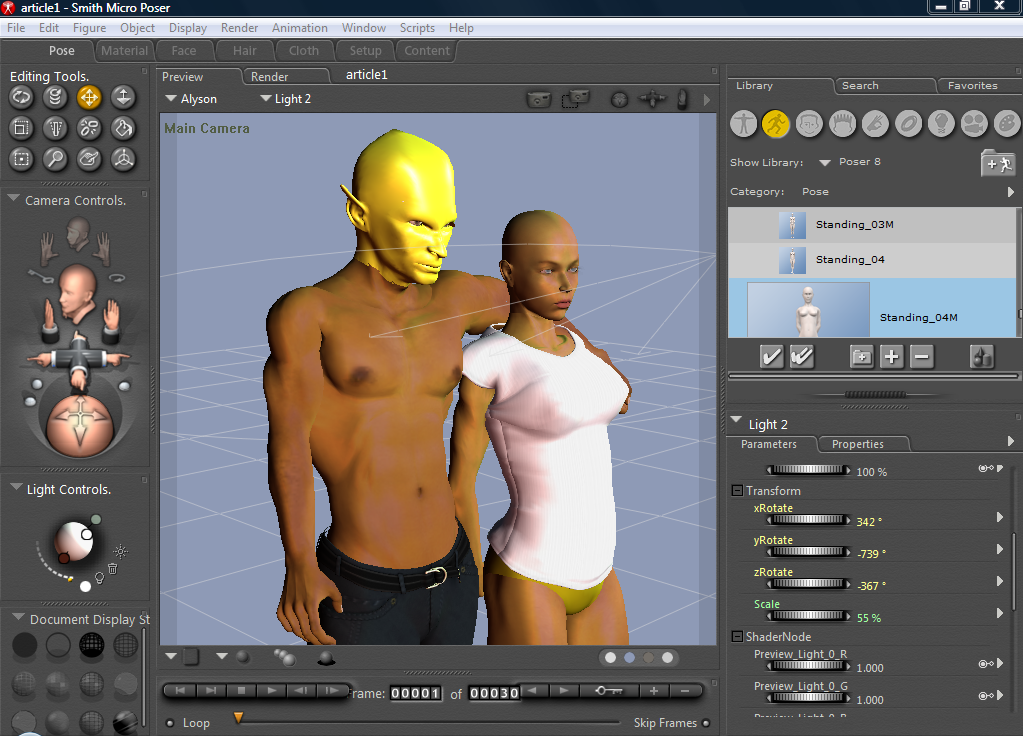
Illustration 9: This is the screen shot of the pose room at completion.
Notice in Illustration 9, three point lighting was used. There was a white light set at intensity 100. It was infinite and cast shadows. It is the light in the light controls that rests between the other two lights. The light at the bottom was a diffuse point light whose intensity was set at 40. Shadows were set at off. This light was set to red so as to be complimentary to the predominantly green picture. Usually this is set to the background color to add ambiance to the scene. In this case it was used as a compliment much as complimentary colors are used to create grays in shadows in paintings. A specular point light is the top light. Its intensity was set at 125. It had a light green tinge. This is usually referred to as a back light. In this picture though, it was kept a little higher than normal to bring out more intense highlights. It did not cast shadows.
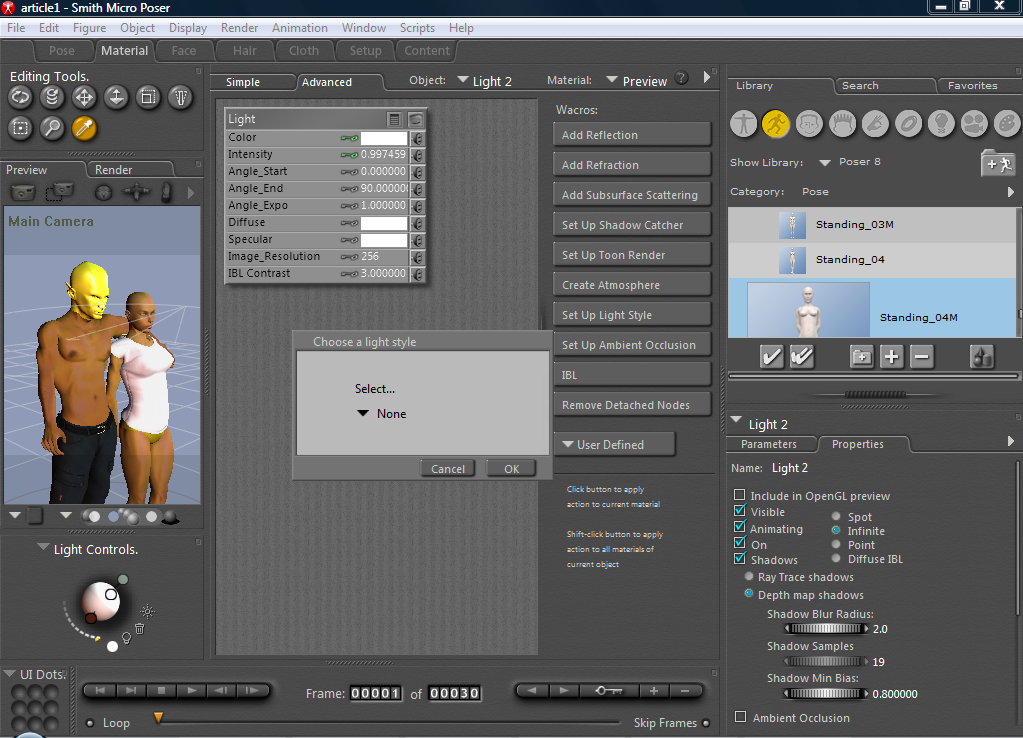
Illustration 10: Using Wacros to Set Up Light Style.
As can be seen in Illustration 10, to set the Light Style one can open the Wacros panel. Then the Set Up light Style button was clicked which opened up the Choose a light style dialogue. Next the arrow pointing down was pressed; and three light style options were offered: diffuse only, specular only, and white only. It has already been mentioned which light style our lights used. Normally the key light is the white light; the back light is specular; and the fill light is diffuse.
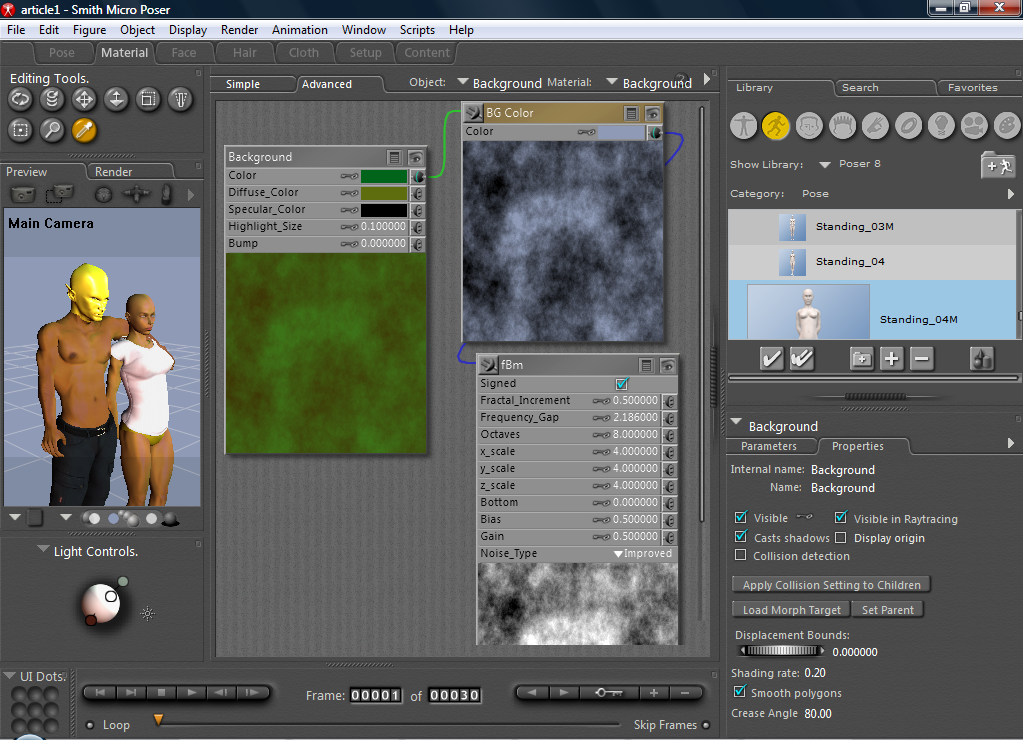
Illustration 11: The background material.
To make the Background Material two different shades of green were placed in the first node for color and diffuse-color. A new node was made for color. The node was created by going to math and then simple color. The color chosen was a light blue-gray. Then a new node was created for this color; 3D Textures and then fBm. Some of the variables under fBm were tweaked until the desired effect was achieved. See Illustration 11.
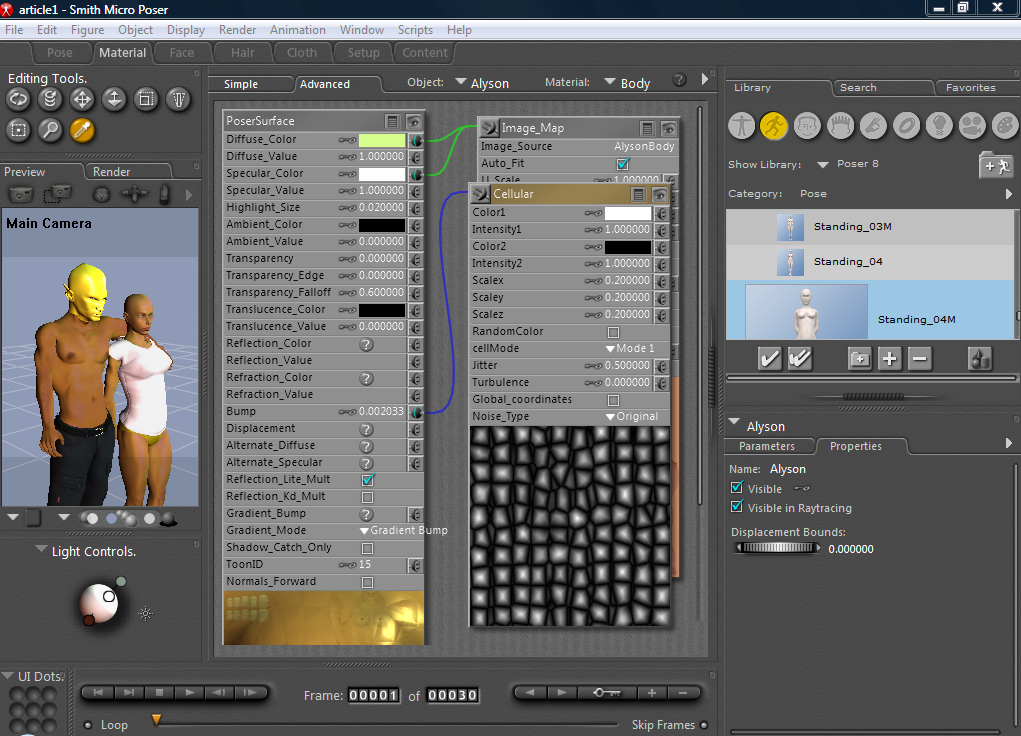
Illustration 12: The lizard girl's body material.
Basically four materials had to be changed to give the lizard people their special skin texture and color. The four materials were for the bodies of both characters and their respective heads. A new node was added for each to Bump. The node was 3D, Cellular. The improved box was checked for all. The Scalex, Scaley, and Scalez were all set at 0.2. The bump height was changed to around .002 for the female body and head material and around .003 for the male lizard person. Also the diffuse color box was changed to give them their unique color as well as to help match the colors of the bodies to their respective heads. A UV map and bitmap texture were created with UV Mapper for the male head, but it was not used.
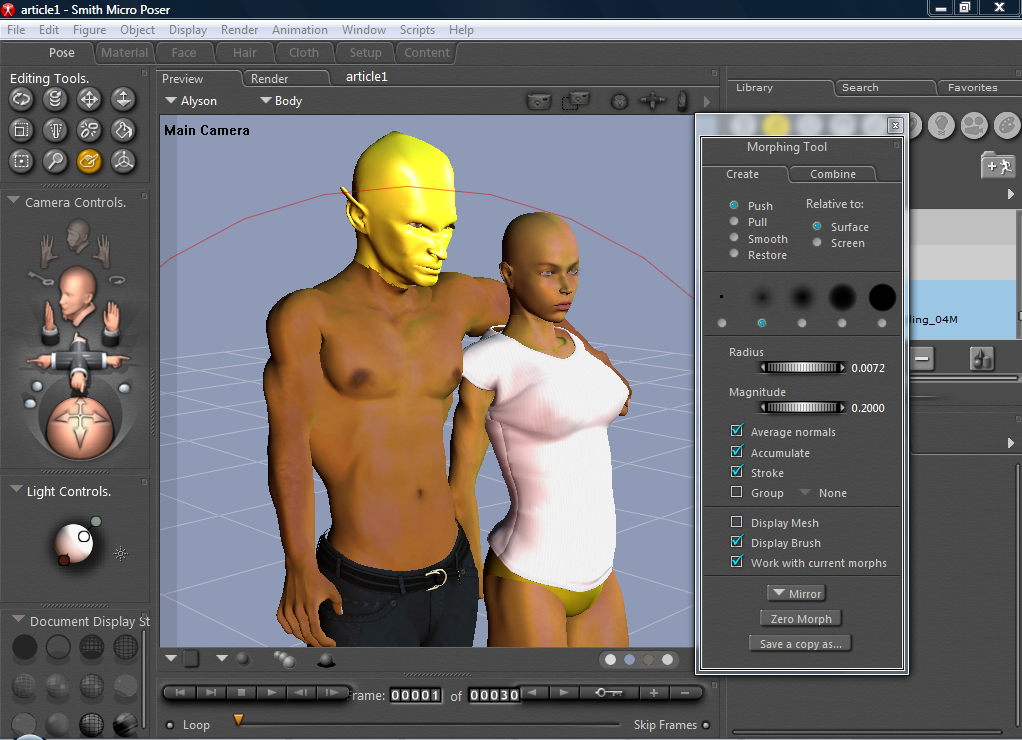
Illustration 13. The morphing tool was used to hide areas of flesh that bulged through the lizard girl's shirt.
The clothing that was used was all conforming. Much of the lizard girls body had been morphed, and the conforming shirt had places where the skin bulged through. The Morphing Tool was used to push and smooth the skin back under the shirt. The Morphing Tool was also used to pull at the shirt so that it would appear that the lizards girl's nipples were jutting forward under the shirt.
The picture was rendered and saved as a .jpg file. Then some minor postwork was done with Gimp 2.6. The Author of this work Charles McChesney has a website at https://artcomp1.tripod.com/and his book is being sold on Amazon.com at http://www.amazon.com/Fantasy-Land-Charles-McChesney/dp/0557112648/ref=sr_1_1?i=1258031801&sr=8-1.e=UTF8&s=books&qid.